
Back pain can feel like an unwelcome guest that overstays its welcome. Whether it’s a dull ache from sitting all day or a sharp twinge from an old injury, it can disrupt your life. Many people search for a gentle, effective way to manage this discomfort. Yoga offers a path to not only soothe your back but also strengthen it, improving your overall well-being right from the comfort of your home.
This guide will walk you through everything you need to know. We will explore how a consistent yoga practice can benefit your back. You’ll learn specific poses designed for relief, complete with simple instructions. Finally, we’ll cover essential tips to ensure your home practice is safe and effective.
Why Choose Yoga for Your Back?
Yoga is more than just stretching; it’s a holistic practice that combines physical postures, breathing techniques, and mindfulness. This combination is uniquely suited to address the complex causes of back pain. It doesn’t just mask the symptoms it works to correct the underlying imbalances.
Here’s how yoga can make a difference:
- Improves Flexibility and Mobility: Tight muscles, particularly in the hamstrings and hips, can pull on your lower back, causing strain and misalignment. Yoga poses gently lengthen these muscles, releasing tension and increasing your range of motion. This allows your spine to settle into a more natural, comfortable position.
- Builds Core Strength: Your core is the support system for your entire torso. Weak abdominal and back muscles force your spine to carry more of the load, leading to pain and instability. Yoga poses like Plank and Bridge build deep core strength, creating a natural “corset” that stabilizes your spine and reduces strain.
- Enhances Posture: Poor posture from slouching over a desk or phone is a primary cause of chronic back and neck pain. Yoga cultivates body awareness, helping you recognize and correct postural habits. By strengthening the muscles that support an upright posture, you train your body to sit and stand taller with less effort.
- Reduces Stress: Stress causes your muscles to tense up, often leading to a tight, sore back. The mindful breathing (pranayama) and relaxation techniques in yoga help calm your nervous system. This process lowers stress hormones and allows your muscles, including those in your back, to relax deeply.
6 Essential Yoga Poses for Back Pain Relief
Getting started is simple. You don’t need to be a flexibility expert to benefit from these poses. All you need is a mat and a few minutes. Focus on how your body feels and never push into sharp pain.
1. Cat-Cow Stretch (Marjaryasana-Bitilasana)
This gentle, flowing movement is perfect for warming up the spine and releasing tension in your entire back.
- Start: Begin on your hands and knees in a tabletop position. Your wrists should be under your shoulders and your knees under your hips.
- Cow Pose: As you inhale, drop your belly towards the mat. Lift your chest and tailbone, looking slightly forward. Create a gentle dip in your spine.
- Cat Pose: As you exhale, round your spine toward the ceiling. Tuck your chin to your chest and press the mat away with your hands. Think of a cat arching its back.
- Flow: Continue moving between Cow on your inhales and Cat on your exhales for 5-10 full breaths.
2. Child’s Pose (Balasana)
This resting pose provides a wonderful stretch for the lower back and hips, promoting relaxation.
- Start: From your tabletop position, bring your big toes to touch and widen your knees slightly.
- Action: Exhale and sit your hips back towards your heels. Fold your torso forward, resting it between or on top of your thighs.
- Rest: Extend your arms forward or rest them alongside your body with palms facing up. Let your forehead rest on the mat. Breathe deeply into your back, feeling it expand with each inhale. Hold for 30-60 seconds.
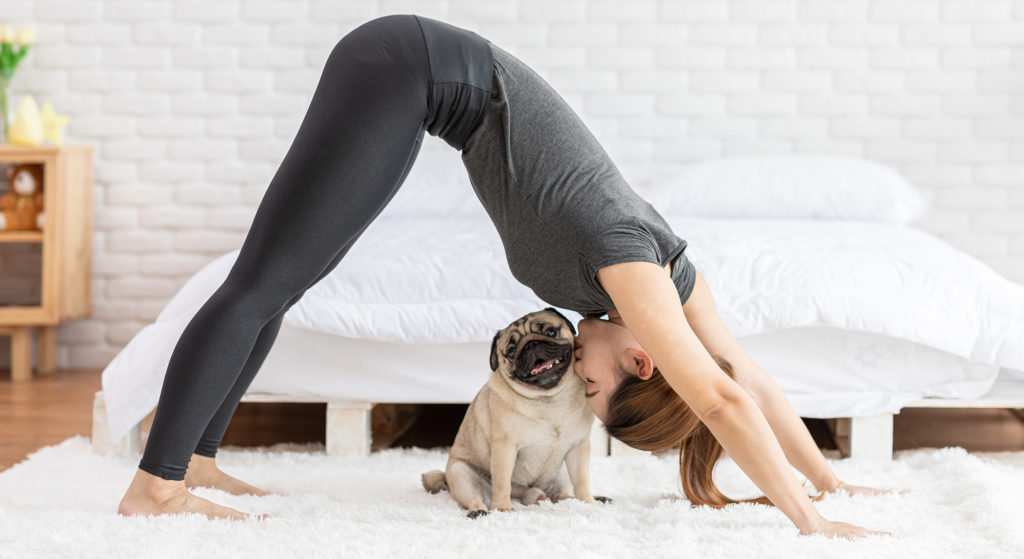
3. Downward-Facing Dog (Adho Mukha Svanasana)
This foundational yoga pose stretches the entire backside of the body, from your calves and hamstrings all the way up your spine.
- Start: From tabletop, tuck your toes and lift your hips up and back, forming an inverted V-shape.
- Action: Keep your head between your upper arms, looking toward your knees. Press firmly through your hands and spread your fingers wide.
- Modification: It’s okay if your heels don’t touch the ground. Bend your knees generously to prioritize a long, straight spine. You can “pedal” your feet by bending one knee and then the other to gently stretch your hamstrings. Hold for 5-8 breaths.
4. Supine Twist (Supta Matsyendrasana)
Twists are excellent for increasing spinal mobility and releasing tension in the lower back and glutes.
- Start: Lie on your back with your knees bent and feet flat on the floor.
- Action: Extend your arms out to the sides in a “T” shape. Exhale and gently drop both knees over to your right side.
- Deepen: Keep both shoulders grounded on the mat. You can turn your gaze to the left to increase the stretch. Breathe into the stretch for 30 seconds. Inhale to bring your knees back to the center, and exhale to repeat on the left side.
5. Bridge Pose (Setu Bandhasana)
This pose strengthens your glutes, hamstrings, and back muscles while gently stretching the front of your body.
- Start: Lie on your back with your knees bent, feet flat on the floor hip-width apart. You should be able to just touch your heels with your fingertips.
- Action: Inhale and press through your feet to lift your hips off the floor. Keep your thighs parallel. Clasp your hands together under your back and roll your shoulders underneath you.
- Hold: Engage your core and glutes to support the lift. Hold for 5-8 breaths, then exhale and slowly lower your spine back to the mat.
6. Sphinx Pose (Salamba Bhujangasana)
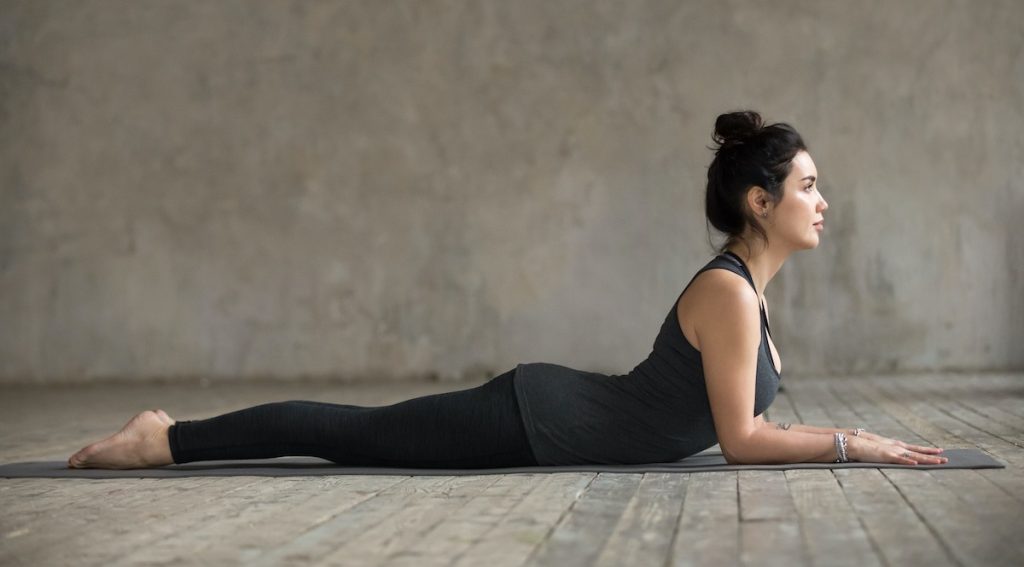
This is a gentle backbend that helps strengthen the spine and stretch the chest and abdomen. It’s a great alternative if Cobra pose feels too intense.
- Start: Lie on your stomach with your legs extended behind you.
- Action: Place your elbows directly under your shoulders and your forearms parallel on the mat.
- Lift: Inhale and gently lift your head and chest off the floor, pressing your pubic bone into the mat to protect your lower back. Keep your gaze forward.
- Hold: Feel the gentle arch in your lower and mid-back. Hold for 30-60 seconds, breathing steadily.
Tips for a Safe and Effective Home Practice
To get the most out of your practice and prevent injury, keep these tips in mind:
- Listen to Your Body: This is the most important rule. If a pose causes sharp or shooting pain, back off immediately. Mild discomfort from a stretch is okay, but pain is a signal to stop.
- Start Slow: Begin with just 10-15 minutes a day. Consistency is more important than intensity. As you get stronger and more comfortable, you can gradually increase the duration of your practice.
- Breathe: Don’t hold your breath. Focus on slow, deep, and steady breathing. Your breath is your guide; it helps you stay present and allows your muscles to relax into the poses.
- Use Props: Don’t be afraid to use pillows, blankets, or books to support you. A pillow under your knees in Child’s Pose or a folded blanket under your hips in Bridge Pose can make a big difference.
- Consult a Professional: If you have a serious back condition, a recent injury, or are pregnant, talk to your doctor or a physical therapist before starting a yoga practice.
Embrace a Stronger, Healthier Back
Incorporating yoga into your routine can be a transformative step toward managing and preventing back pain. It empowers you with the tools to build strength, increase flexibility, and calm your mind. By starting with these simple poses and practicing safely, you are taking active control of your well-being. A few minutes on the mat each day can lead to a lifetime of better back health.